Tag Best Selling Products
Implementing a workflow to tag bestselling products is crucial for optimizing business operations and boosting revenue growth. You can now use Auto Tags to tag best-selling products.
Please note that implementing the best-seller workflow requires the Professional plan and above, so you need to upgrade to at least the Professional plan to use this feature.
The easiest way to configure this workflow is to visit the Workflow Library and search for "Tag bestselling products". Then click the "Import & Edit" button to import the workflow directly into your account.

You can customize the workflow according to your specific needs and criteria.
The workflow supports the following configurations:
- Product tag to be used: Specify the tag assigned to the bestselling products.
- Consider Orders Placed in the Last N Days: Determine the timeframe for identifying bestselling products. For instance, you can configure the workflow to tag best-selling products based on orders from the last 30 days.
- Number of Top-Selling Products to Tag: Define the quantity of top-selling products to be tagged. If, for example, you wish to tag the top five best-selling products, input "5" here.
- Minimum Sold Limit: Optionally, set a minimum threshold for the number of units sold before a product is tagged as a bestseller. Leave this field empty if no minimum limit is required.
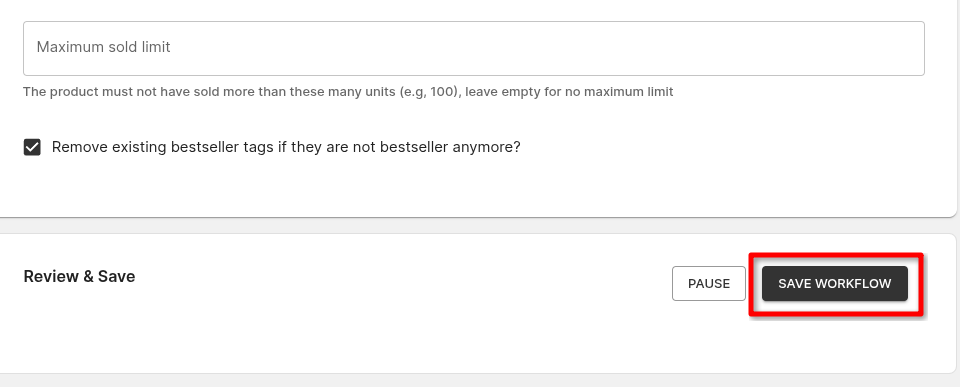
- Maximum Sold Limit: Similarly, you can establish a maximum threshold for the number of units sold. Leave this field empty if no maximum limit is required.
- Remove Tag If Product is No Longer a Bestseller: Configure the workflow to automatically remove the tag if a product no longer meets the criteria of being a bestseller.
Here's the screenshot of how to configure the bestseller workflow to tag the top 10 best-selling products in the last 30 days:

Once you complete configuring the workflow, click the "Save" button to save the workflow configuration.
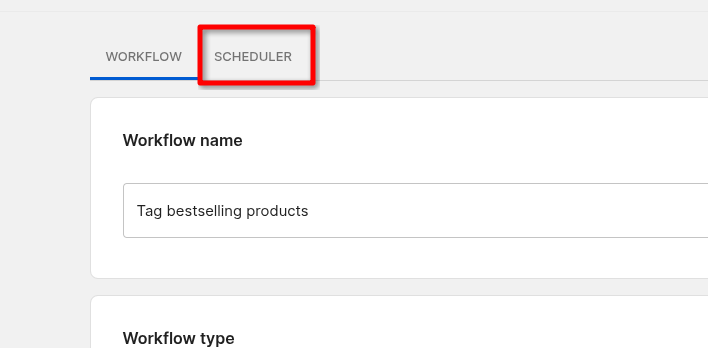
Since the bestseller workflows won't run in real-time, you'll have to schedule the workflow to run once a day. To schedule the workflow, open the workflow configuration once more and go to the scheduler tab.
Once you are on the Scheduler page, you should see the following screen.
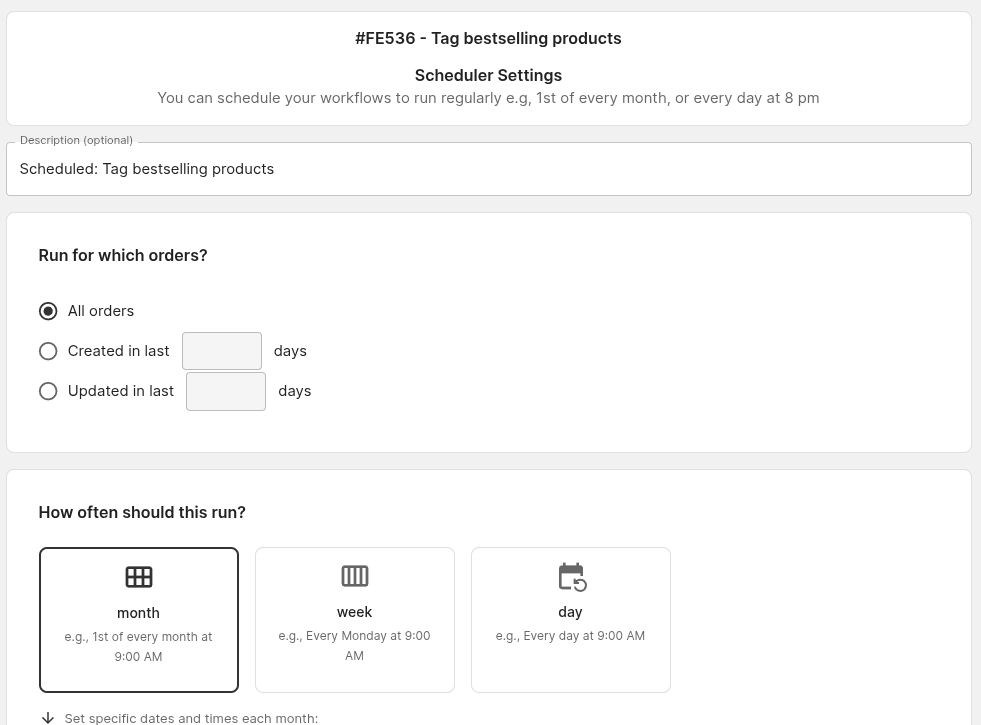
Under the "Run for which orders?" section, you'll have to specify the number of orders you want the workflow to process.
Since the bestseller workflow is configured to calculate bestsellers based on orders from the last 30 days, you'll have to input 60 days in the "Created in last" input box.
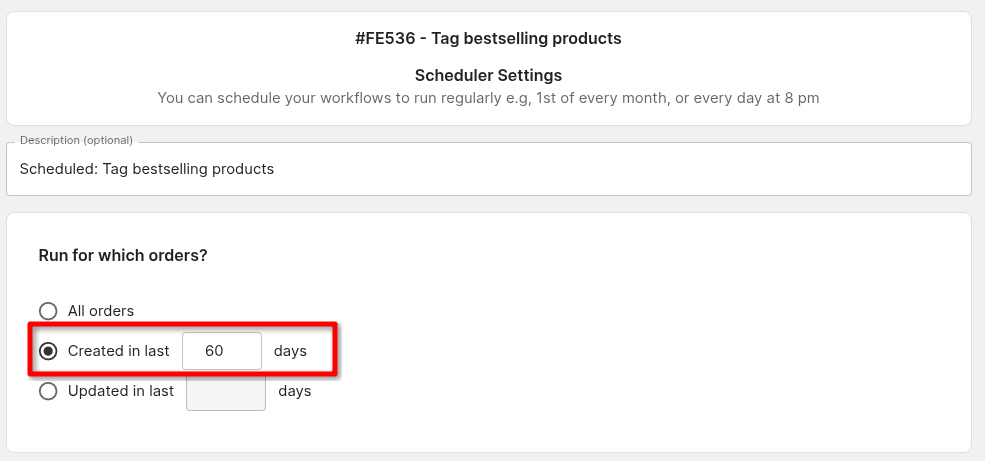
As a rule of thumb, the scheduler should process orders created approximately twice the lookback period used by the workflow. For example, if the workflow is configured to tag best sellers based on the last 60 days of sales, the scheduler should run against orders created in the last 120 days rather than all orders in the store.
After you've entered the days, you can specify the frequency at which you want to run the workflow. For the best seller workflows, we have to configure the scheduler to run once a day.
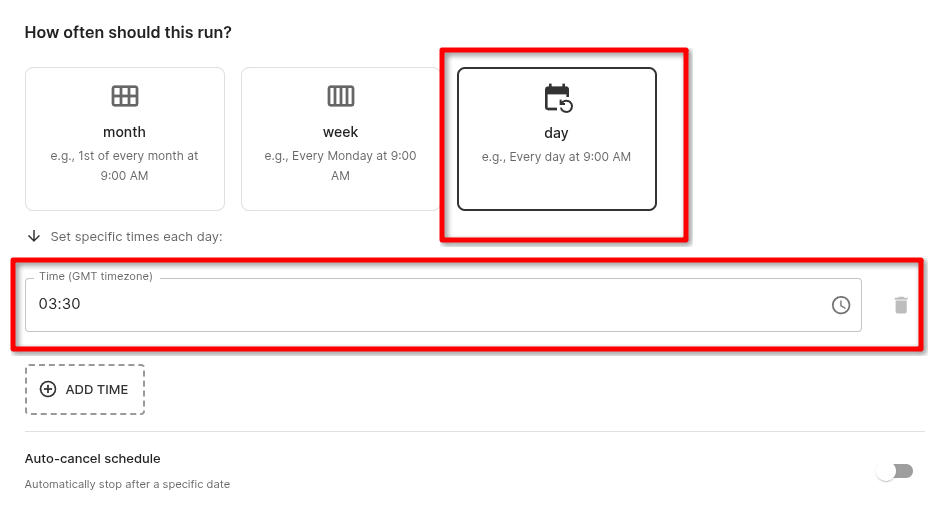
Please note that the app currently supports the GMT timezone, so keep this in mind while entering the time.
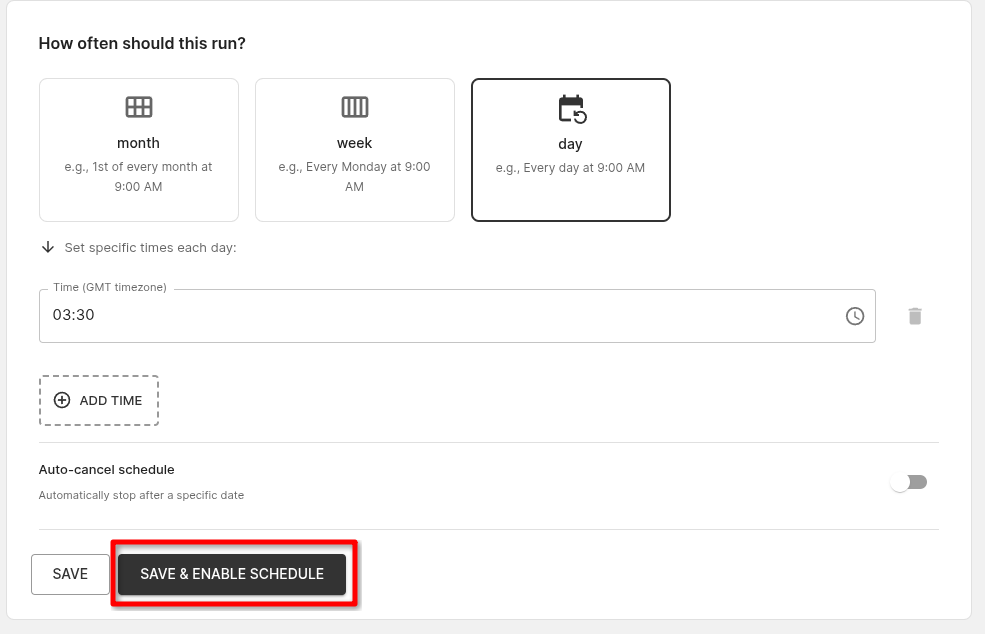
To enable the schedule, you must first save it. Click the Save button at the bottom of the Scheduler page.

Once saved, a new button labeled Save and Enable will appear next to the Save button. Click Save and Enable to activate the workflow schedule.
That's it! You’ve successfully scheduled the workflow, and it will tag best-seller products in the next run.